

Creating immersive game worlds is a fundamental aspect of game development, and level design plays a crucial role in ensuring players have an engaging and enjoyable experience. With tools like Artifex Terra 3D, aspiring game developers can unleash their creativity to design breathtaking landscapes and interactive environments. This beginner’s guide will walk you through the essential steps and techniques needed to get started with level design using Artifex Terra 3D.
Understanding Level Design
Before diving into the software, it’s essential to grasp the fundamentals of level design. Level design is the process of creating the environment and layout in which players interact, including the placement of objects, obstacles, and pathways. A well-designed level should enhance gameplay, facilitate storytelling, and immerse players in the game world.
Key Principles of Level Design
- Flow: A level should guide players through the environment naturally. Designers should consider how players will navigate the space and ensure there are clear pathways and objectives.
- Balance: Levels should offer a balance of challenge and reward. This means providing obstacles that are neither too easy nor too difficult to overcome.
- Pacing: The pacing of a level should match the game’s overall rhythm. Slow-paced sections can build tension, while fast-paced areas can heighten excitement.
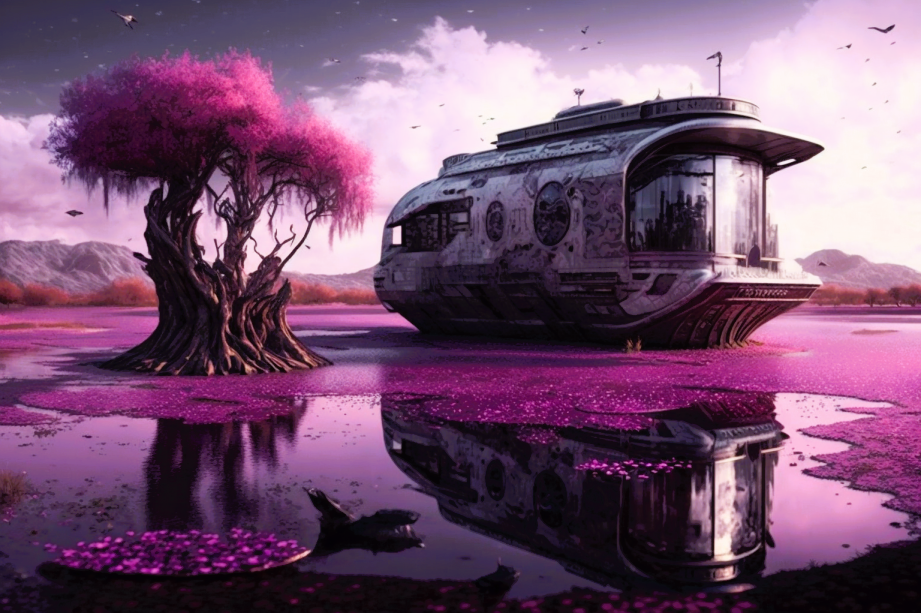
- Aesthetics: Visual elements significantly impact player immersion. A cohesive art style and thoughtful use of colors, lighting, and textures are essential for creating a believable world.
- Storytelling: Environments should convey the game’s narrative, providing context and enhancing the player’s emotional connection to the story.
Getting Started with Artifex Terra 3D
Artifex Terra 3D is a powerful terrain editor that simplifies the process of creating rich and detailed landscapes. Its user-friendly interface allows even beginners to craft stunning environments quickly. Here are the key features and tools that will help you get started:
Installation and Setup
- Download and Install: Visit the Artifex Terra 3D website to download the software. Follow the installation instructions provided.
- Familiarize Yourself with the Interface: Once installed, open the program and take some time to explore the interface. Familiarize yourself with the different panels, tools, and menus.
Basic Tools Overview
Artifex Terra 3D offers various tools to aid in terrain editing:
- Terrain Editing Tools: Use tools like Raise, Lower, and Blur to manipulate the landscape. These tools allow you to create hills, valleys, and other geographical features.
- Texture Painting: Apply textures to your terrain using the splatting feature. You can layer different textures to create realistic surfaces such as grass, dirt, and rock.
- Color Layers: Add color layers to your terrain to enhance visual depth and detail. This is particularly useful for creating diverse biomes or environments.
- Dynamic Lighting: Utilize the dynamic lighting feature to set the mood of your scene. Adjust the intensity, color, and angle of light sources to create atmospheric effects.
Designing Your First Level
Now that you’re familiar with the tools, it’s time to design your first level.
- Define Your Concept: Before diving into the software, define the concept of your level. What kind of environment do you want to create? Consider the gameplay mechanics and story elements that will guide your design choices.
- Create a Heightmap: Use a heightmap as a foundation for your terrain. You can either create one from scratch or import an existing heightmap. This will dictate the basic shape of your landscape.
- Sculpt the Terrain: Use the terrain editing tools to sculpt your landscape. Experiment with different shapes and elevations to create interesting geographical features.
- Apply Textures: Once you have the terrain sculpted, it’s time to apply textures. Choose appropriate textures for your environment and use the splatting tool to blend them together seamlessly.
- Add Details: Enhance your level by adding smaller details such as rocks, trees, and other objects. Artifex Terra 3D allows you to import custom models or use its built-in assets.
- Implement Lighting: Set up dynamic lighting to give your level depth and atmosphere. Play with the positioning and intensity of lights to create a compelling mood.
Testing Your Level
Once your level is designed, it’s crucial to test it thoroughly. Play through your level multiple times to identify any issues with navigation, pacing, or difficulty. Gather feedback from friends or fellow developers to gain insights into potential improvements.
Iteration and Refinement
Level design is an iterative process. Based on your testing and feedback, refine your level by adjusting layouts, adding or removing obstacles, and enhancing visuals. Don’t hesitate to make significant changes if they enhance the overall experience. 10 Best Games With Amazing Landscape Design, more details at this link.
Integrating with Game Engines
After finalizing your level in Artifex Terra 3D, you’ll want to integrate it into your game engine. The software supports exporting terrains to popular engines like Unity and Unreal Engine, allowing you to bring your design to life.
Creating engaging game worlds with Artifex Terra 3D is an exciting journey that combines creativity and technical skills. By understanding the principles of level design and utilizing the powerful tools available in the software, you can craft immersive environments that captivate players. Remember that level design is an iterative process—don’t be afraid to experiment and refine your creations.
For further reading on level design and game development, consider exploring resources on platforms like Fandom to deepen your knowledge and gain inspiration from other designers.
With practice and dedication, you can transform your ideas into stunning game worlds that resonate with players. Happy designing!