

Creating immersive and captivating environments is one of the most exciting aspects of game development. With tools like Artifex Terra 3D, developers can easily design unique biomes that enhance the gameplay experience. This article explores how to use Artifex Terra 3D to create diverse biomes—such as deserts, forests, and mountains—allowing you to transport players into beautifully crafted worlds.
Understanding Biomes
Before diving into the creation process, it’s essential to understand what a biome is. A biome is a large ecological area characterized by its distinct climate, flora, and fauna. In games, biomes serve as the backdrop for gameplay and storytelling, influencing player interactions and the overall atmosphere. Common biomes include:
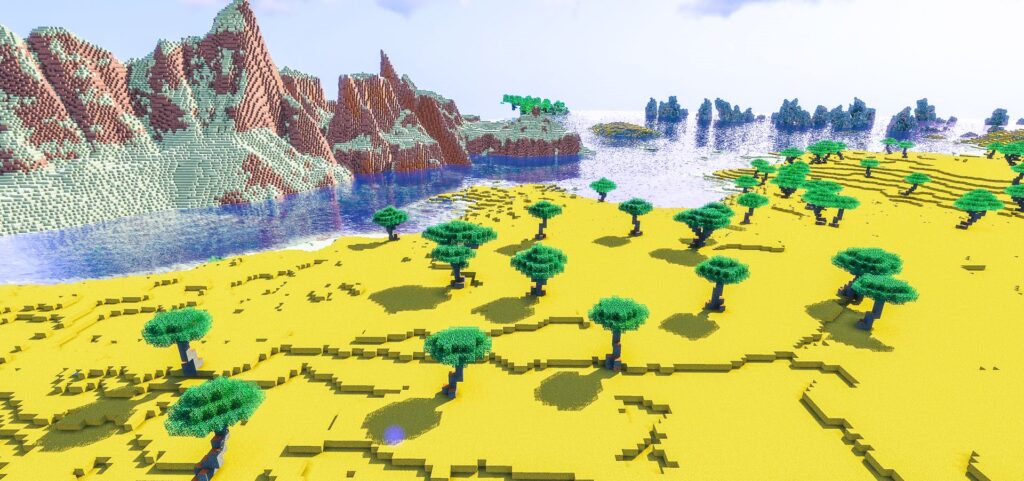
- Deserts: Dry, arid regions often characterized by sand dunes and sparse vegetation.
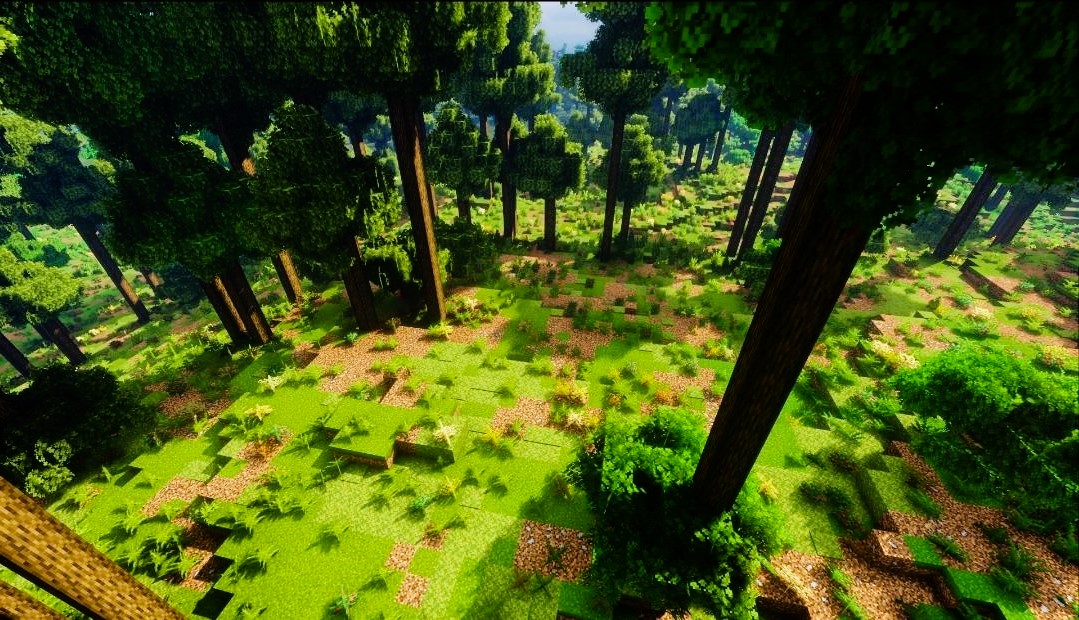
- Forests: Lush, green areas teeming with trees, plants, and wildlife.
- Mountains: Elevated regions featuring rocky terrains, snow-capped peaks, and rugged landscapes.
Each biome presents unique challenges and opportunities for gameplay, making their design critical to player immersion.
Getting Started with Artifex Terra 3D
Artifex Terra 3D is a powerful terrain editor that allows developers to create detailed landscapes using height maps and various texturing tools. The software is designed to be user-friendly, making it accessible for both beginners and experienced developers. Here’s a step-by-step guide on how to create different biomes using Artifex Terra 3D.
Step 1: Setting Up Your Project
- Launch Artifex Terra 3D: Open the application and start a new project.
- Choose Terrain Size: Determine the size of your terrain. Larger terrains allow for more expansive biomes but may require more processing power.
- Import a Height Map: If you have a specific height map in mind, you can import it to give your terrain a natural look. Alternatively, you can use the built-in height map generator to create one from scratch.
Step 2: Creating a Desert Biome
- Adjust the Terrain: Use tools like “Lower” and “Raise” to sculpt the landscape. Deserts typically have rolling dunes and flat areas. Use the “Blur” tool to smooth out harsh transitions between different heights.
- Texture Painting: Apply sand textures using the “Texture Painting” tool. Artifex Terra 3D supports multiple textures, allowing you to blend different shades of sand for a more realistic look.
- Adding Vegetation: Deserts may have sparse vegetation. Use the object placement tools to add cacti or sparse shrubbery strategically across the landscape.
- Dynamic Lighting: Adjust the lighting settings to create a hot, sun-drenched atmosphere. Bright lighting can simulate the harsh conditions typical of desert environments.
Step 3: Designing a Forest Biome
- Create a Varied Terrain: Forests typically feature hills, valleys, and rivers. Use the “Raise” tool to create these variations. Consider adding small lakes or streams for added detail.
- Texture Application: Choose a range of green textures for grass and foliage. Apply different textures to represent forest floors, underbrush, and tree canopies.
- Plant Life: Use the object placement tool to add various trees, bushes, and flowers. Artifex Terra 3D allows you to import custom models if you want to create unique plant species.
- Atmospheric Effects: Implement fog or light rays filtering through the trees to enhance the forest’s ambiance, adding depth and mystery to the environment.
Step 4: Constructing a Mountain Biome
- Sculpting the Landscape: Use the “Raise” tool extensively to create jagged peaks and steep slopes. Mountains often have sharp, dramatic landscapes, so focus on creating pronounced features.
- Texturing: Apply rocky textures to the steep sides and use different shades to simulate snow caps at higher altitudes. You can blend textures for a more natural transition between rocky and snowy areas.
- Vegetation Placement: In higher altitudes, add coniferous trees that thrive in mountainous regions. Use the object placement tool to scatter them across the lower slopes and valleys.
- Creating Atmosphere: Add cloud layers or atmospheric effects to give the mountains a majestic and towering appearance. Consider incorporating weather effects like snow or rain for additional realism. See our article on Exploring the World of Role-Playing Games (RPGs) at this link.
Optimizing Your Biomes
Once you’ve created your biomes, it’s essential to optimize them for performance. Artifex Terra 3D allows you to export your landscapes into various game engines seamlessly. Ensure that your terrains are appropriately sized and textured to maintain a balance between quality and performance.
Tips for Optimization
- Limit Polygon Count: Keep your terrain and objects low-poly to ensure smooth performance, especially on lower-end systems.
- Use Level of Detail (LOD): Implement LOD techniques to reduce the detail of distant objects and terrains, improving frame rates without sacrificing visual quality.
- Test in Engine: Always test your biomes in the game engine you plan to use. This allows you to make adjustments based on gameplay needs and performance metrics.
Conclusion
Creating unique biomes with Artifex Terra 3D allows developers to craft immersive worlds that enhance player engagement. Whether designing arid deserts, lush forests, or towering mountains, the software provides the tools needed to bring your vision to life. By understanding biome characteristics and utilizing the features of Artifex Terra 3D, you can create diverse environments that captivate players and enrich your game experience.
For more information on biomes and their significance in gaming, you can check out this link on Wikipedia.